Migrating Microsoft Azure Resources
I needed to migrate the resources of an existing Microsoft Azure subscription to another Microsoft Azure subscription. Although the Azure…

I needed to migrate the resources of an existing Microsoft Azure subscription to another Microsoft Azure subscription. Although the Azure portal contains functionality to move some resource types, I needed to copy the resources as the existing applications must continue to run during the migration.
I like to share the methods I used to copy the Azure resources. Before copying the content of the Azure resources, I created the resources using PowerShell. I copied the following resources.
- Azure Storage Accounts
- Azure App Services,
- Azure Virtual Machines
- Azure Media Services.
Migrating Azure Storage Accounts
I found that the fastest and easiest way to copy an Azure Storage Account is by using AzCopy. V10 of AzCopy, which is currently in preview and supports copying an entire storage account to another storage account. Before you can start copying, you will have to generate two SAS (Shared Access Security) tokens, one for the source Storage Account, and another for the destination Storage Account. The SAS tokens and SAS URLs can be created using the Azure portal via the Shared access signature menu option. See the screenshot below.
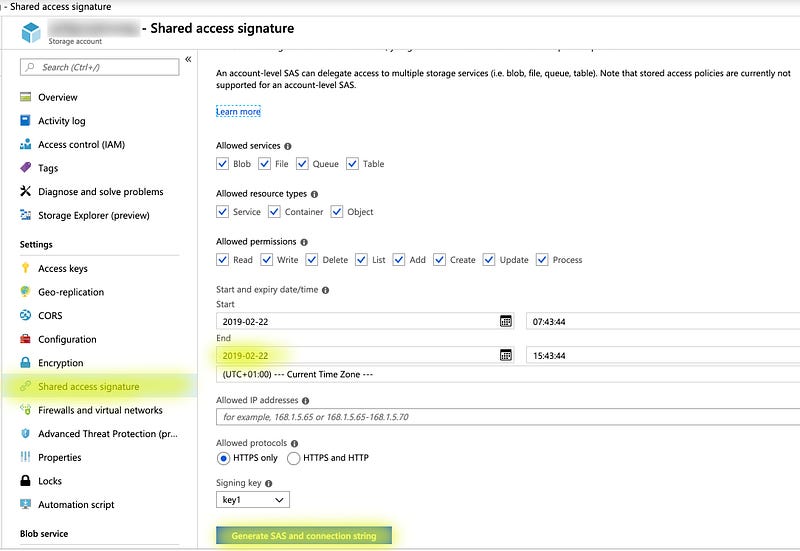
Depending on the size of the storage account, you would like to set the expiry date/time further in the future.
When you have generated both the source and destination SAS token. You can copy the entire storage account with AzCopy using the following command-line:.\azcopy cp "https://sourceaccount.blob.core.windows.net/<sastoken>" "https://destinationaccount.blob.core.windows.net/<sastoken>" --recursive=true
AzCopy directly copies the blob containers from the source Storage Account to the destination Storage Account. At this time, AzCopy v10 supports copying only block blobs between two storage accounts. It skips all other storage account objects (append blobs, page blobs, files, tables, and queues).
Migrate Azure App Services
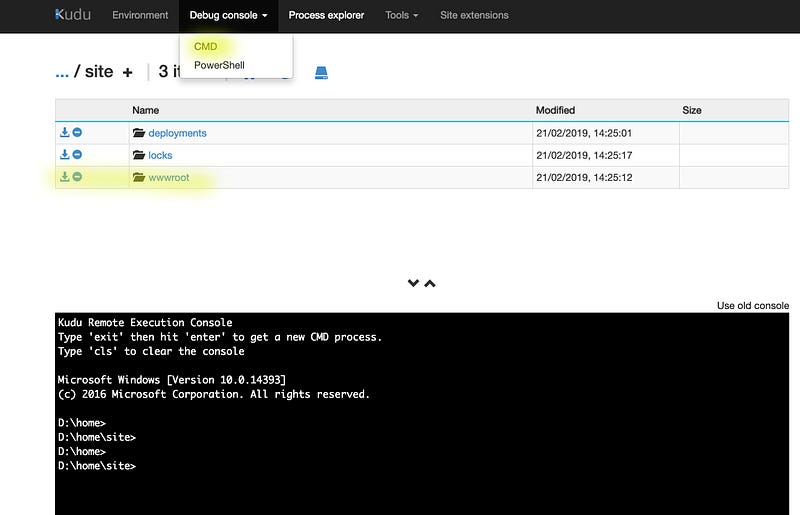
Copying an Azure App Service can be done via the Azure Portal using the Advanced section of an App Service. When you select CMD or PowerShell in the top menu, it is possible to download a ZIP of the wwwroot folder by clicking the little download icon, the first icon on the left. If the folder contains a lot of small files (node_modules), this could take a while. Some of my projects took 20 minutes to download.
Uploading and unzipping the file to the destination App Service is also functionality that is available in the portal. Although it is tough to find.
In the same Advanced section of an App Service, there is the option Zip Push Deploy. This option lets you drag and drop the downloaded zip from the previous step, see below.
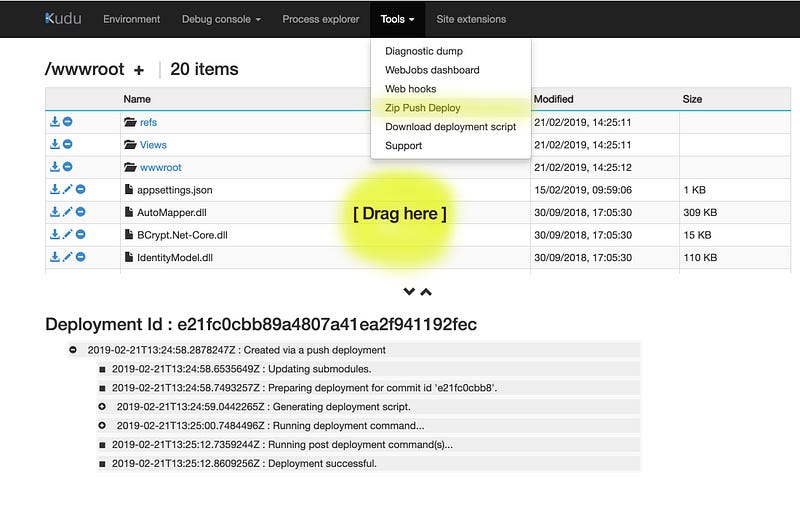
When you drop the zip, the portal automatically unzips the file and stores the files into the wwwroot folder of the selected App Service.
Migrating Virtual Machines
Migrating a Virtual Machine is a little more complicated than the previous resource types. You can do it while the Virtual Machine is running if you are using managed disks. It consists of the following four steps:
- Creating a snapshot of the OS and data disks
- Exporting the snapshots of the OS and data disks
- Copying the snapshots into an Azure Storage Account
- Building a new virtual machine based on the snapshots in the storage account
Creating a snapshot of the OS and Data disks of a Virtual machine is only possible when you are using managed disks. If not, you first have to convert the disks to managed disks before making a snapshot. Azure will shutdown your Virtual machine when converting to managed disks.
Creating a snapshot
Creating a snapshot is as easy as pressing the Create snapshot button. The snapshot will be built at the location that you choose. You can download it directly, but a better option is to move it to a new position where it can be used to serve as a base disk of your new VM.

Exporting the snapshot
To be able to move the snapshot to a Storage Account, you must export the snapshot. Search the snapshot in the Azure portal and export the snapshot by clicking the export button. The portal generates a URL that provides access to the snapshot. The default URL is valid for one hour. If you add a zero to the expire time, you buy yourself some more time. Be sure to copy and store that URL as you cannot retrieve it later (you can regenerate it).

Copying the snapshot
Once you have the export URL, you can use it to copy it to the location from which you create the VM. For example, store it in a container called vhds in an Azure Storage Account. You can copy the snapshot using a small PowerShell script.
The PowerShell script will start the copy but won’t show any progress; it will directly end. You can check the status via the portal or use PowerShell cmdlet Get-AzureStorageBlobCopyState to retrieve the state.
Creating a new virtual machine
When the snapshots are copied and available, they can be used to create a new virtual machine. I also use PowerShell to build it as it lets me repeat and automate the process.
On row 10, a new Azure disk is created using the exported snapshot URL via the -SourceUri $osDiskUri, which is later used on the next line to create the OS disk for the virtual machine.
Migrating Azure Media Services
Azure Media Services is a Microsoft Paas offering that can be used for encoding video, content protection, and video streaming. Typically, when using Media Services, you feed it master video files that are encoded to multi bitstream assets that are used to stream it to clients.
When you want to migrate a Media Service account, you usually don’t want to reencode the master video files as encoding costs money. So you have to migrate the multi bitstream assets. A .Net client SDK is available for Azure Media Services, which allows you to interact programmatically with the Media Services. Using this SDK, I developed a small console application to migrate an existing Azure Media Services account. You can find the app on GitHub.
The application enumerates all the assets in the source media services account. For each asset it encounters, it creates a new asset in the destination media services. The actual content of the asset is copied using AZCopy. Media services stores the data of each asset in an Azure Storage account, and every asset uses a unique container for its data. After the data is copied, the console app copies all the metadata using the Media Services Client SDK.
See the source on GitHub for more information.


