From Development to Deployment — A Python FastAPI Journey with Docker and Kubernetes
A comprehensive guide to containerizing and orchestrating FastAPI applications


In the tech world, it’s not just about creating an excellent app or tool. The real challenge is getting it out there, running smoothly, and keeping it that way. That’s the game Streamfinity is playing, and they’re using tools like FastAPI, Docker, and Kubernetes to keep them ahead. This article is your step-by-step guide to how they do it.
In a previous story, we shared how Streamfinity built a prototype of their REST API using FastAPI — a Python framework that’s speedy and straightforward. The team pulled it off with flying colors. But that was only part one. The next task was to take the API live.
Moving an app from the cozy confines of the development phase to a live production environment is like going through a maze. There’s a lot to handle — managing resources, ensuring the app is always on, and making it robust enough to handle many users, to name just a few.
Enter Devon Powers, the team’s DevOps whiz. He saw the challenge, rolled up his sleeves, and began preparing the FastAPI app for the big leagues.
In this article, we’re taking you on a tour of Devon’s journey, breaking down his exploration into Docker and Kubernetes deployment.
First, we’ll show you how Devon got Streamfinity’s FastAPI app ready for Docker. We’ll discuss the important stuff — picking the right base image, keeping the image size small, running the app without full admin rights, and sorting out logs and settings.
Then, we’ll switch gears to Kubernetes. We’ll walk you through how Devon managed to get the Docker container up and running within a Kubernetes cluster.
You can access all the source code of Streamfinity’s API, Dockerfile, Kubernetes yaml files, and GitHub actions in the project’s GitHub repository.
So, buckle up, and let’s dive in!
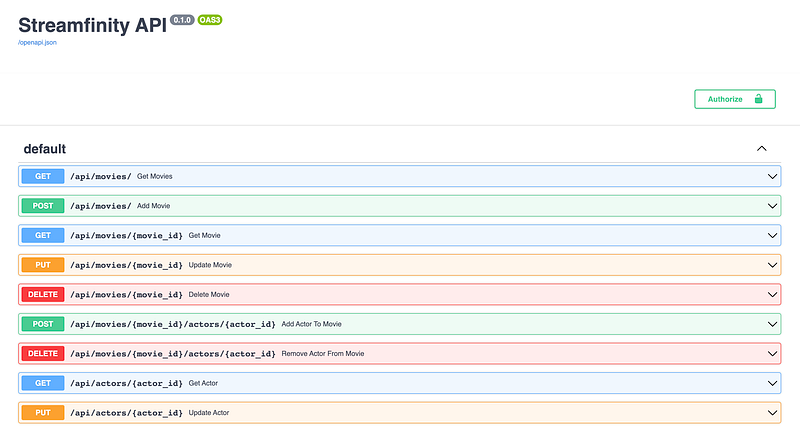
Streamfinity’s FastAPI Application: A Closer Look
Let’s Take a Good Look at Streamfinity’s FastAPI Application Before we dive into the nitty-gritty of getting our FastAPI application ready for the big time, let’s do a quick recap of what makes up the Streamfinity REST API prototype.
Streamfinity REST API
Streamfinity’s REST API is like a Swiss Army Knife — versatile and handy. It has different endpoints that can do many things, from messing around with data to triggering other actions. It’s a big part of what makes Streamfinity tick.
The Building Blocks
There were a few big players in the tech lineup that helped Streamfinity build its REST API:
- FastAPI: This speedy, easy-to-use web framework was the show's star. It’s the backbone of Streamfinity’s REST API.
- Poetry: When building something, you must keep track of all the parts. Poetry, a Python tool for managing dependencies, ensured everything was organized and efficient.
- SQLModel: APIs need to chat with databases. SQLModel, a modern SQL Object-Relational Mapping (ORM), made those conversations a breeze. It was the perfect tool for interacting with the SQLite database.
- SQLite: The team went with SQLite for the database. It’s lightweight, disk-based, and lacks all the baggage of more complex database systems. All of this, is to keep things simple.
Where to Find the Project
You're in luck if you’re curious and want to take a peek under the hood. Streamfinity’s REST API source code is right here in this GitHub repository.
As we continue this journey, the tech we’ve used and how we’ve set up the FastAPI application will be super important. Our next mission is to turn this prototype into a full-fledged application, ready to debut in a production environment.
Our guide on this exciting adventure? Our DevOps engineer, Devon Powers. Get ready for a wild ride full of insights and learning!
Dockerizing the Streamfinity’s FastAPI Application
Before we jump into how we worked Docker magic on the Streamfinity FastAPI application, let’s chat about Docker and why it’s such a big deal. Docker is like a magical toolbox for building, running, managing, and sharing applications.
It uses something called containerization, which is a super-light form of virtualization. Imagine a Docker container as a neat little package. It wraps up an application and all its dependencies into a standardized unit ready for software development. The application can run smoothly anywhere, regardless of the environment.
When we’re gearing up to containerize an application (like Streamfinity’s FastAPI prototype), we have a handy checklist that we follow. This list ensures we’re on the right path to creating a Dockerfile that’s both solid and efficient. Let’s walk through the checklist, one step at a time.
1. Choose the Correct Base Image
Choosing the base Docker image for your Python app is a big deal. You’ll usually want to go with the official Docker images. They’ve got great documentation, follow the best practices, and they’re designed for the most common use cases.
Still, with the official Python Docker images, plenty can choose from. The rule of thumb here is to pick the smallest image that can run your Python app smoothly. As of now, if you want to run your Python app on a 64-bit Linux system, here are your top contenders:
- python:latest → Sizes vary, but it’s usually around a hefty 870MB.
- python:slim → A leaner option, coming in at around 121MB.
- python:alpine → The lightweight champion, weighing in at just 57.4MB.
The Docker team bases the ‘slim’ images on Debian and trims most packages to keep things light. The ‘alpine’ images are based on the Alpine Linux distribution, a minimalistic Linux distribution with a hardened kernel and a small footprint.
If your app runs fine on Alpine, then using an Alpine image as your base image makes sense. It’s likely to give you the smallest final Docker image size. Just remember, these sizes don’t include your app and its dependencies. They’ll take up some additional space.
2. Use a non-root container user
By default, your app runs inside the Docker container as root. Sure, root in a container doesn’t hold as much power as root on your host system, but it can still carry some risks. To minimize these risks, it’s a good call to run your app as a non-root user when you can.
Not all Docker images have this non-root user ready to roll, including the official Python one. No worries, though — we can sort this out ourselves. We’ll add a step to create a non-root user when we get into the nitty-gritty of the Dockerfile for the Streamfinity REST API.
3. Logging from your Streamfinity’s REST api
Logging from a Python application running in a Docker container is straightforward: Log to stdout or stderr, depending on the situation.
The idea behind this is to delegate logging handling to something else. This makes sense as Docker containers are typically used in microservice architectures where responsibilities are shared among multiple services.
I would not recommend using print or directly writing to sys.stderr from your Python application. Instead, consider using a dedicated logging library like Loguru. Loguru logs to stdout and stderr using structured logging, providing a more organized and manageable logging solution.
5. Configuration Management
Managing configurations effectively becomes crucial when running a Python application in a Docker container. This is where environment variables come into play, serving as a secure and efficient way to handle your application’s settings.
You can store these environment variables in a .env file for local development. This file should be added to your .gitignore to ensure it's not tracked by your version control system, protecting sensitive information such as API keys and database credentials.
Here’s an example of what your .env file might look like:
DATABASE_URL=postgresql://user:password@localhost:5432/mydatabase
SECRET_KEY=your-secret-key
DEBUG=True
You can use a library like python-decouple to read these environment variables in your Python application. This library helps to separate the settings parameters from your source code, increasing security, scalability, and convenience.
Here’s how you can use python-decouple:
from decouple import config

SECRET_KEY = config('SECRET_KEY')
DEBUG = config('DEBUG', default=False, cast=bool)
DATABASE_URL = config('DATABASE_URL')
In this example, the config function attempts to fetch the corresponding environment variable. It falls back to the provided default value if it doesn't find one (which might be the case in a production environment).
When running your application in a Docker container, you can pass these environment variables using the -e option with the docker run command or include them in a Docker Compose file if you're using Docker Compose.
By managing configurations this way, you can ensure a secure and scalable setup for your Python application running in a Docker container
6. Starting and stopping your Python app in a container
When you run a Python program inside a Docker container and stop the container, Docker sends a SIGTERM signal to the Python process. Python’s default behavior on a SIGTERM signal is to raise a KeyboardInterrupt exception. Python will exit if your code doesn't catch and handle this exception. This is usually what you want when you're stopping a container.
However, suppose you have some cleanup that needs to be done when your program exits (like closing database connections, freeing up resources, etc.).
In that case, you’ll want to catch the KeyboardInterrupt exception or register a handler for the SIGTERM and SIGINT signals so that you can do your cleanup before the program exits.
import signal
import sys

def handler(signum, frame):
    print('Signal handler called with signal', signum)
    # Do your cleanup here
    sys.exit(0)

# Set the signal handler for both SIGTERM and SIGINT
signal.signal(signal.SIGTERM, handler)
signal.signal(signal.SIGINT, handler)

# Your program goes here...
In this example, when a SIGTERM or SIGINT signal is received, the handler function is called, which can perform cleanup and then exits the program.
For SIGINT, which is the signal sent when you press Ctrl+C, Python translates this into a KeyboardInterrupt exception. Your Python program will stop immediately if you don't handle this exception. If you want to do some cleanup upon a SIGINT, you can either handle the KeyboardInterrupt exception or register a handler for SIGINT, similar to the SIGTERM example above.
In the context of Docker, when you run the docker stop command, Docker sends a SIGTERM signal to the primary process running inside the container. If the process hasn't stopped after a grace period (default is 10 seconds), Docker sends a SIGKILL to force the process to terminate.
Remember, these signal handlers or exception handlers should be added at the top level of your program, so they can catch signals or exceptions from any part of the program.
Handling SIGINT and SIGTERM with Uvicorn
Uvicorn, an ASGI server used to serve Python web applications, is designed to be friendly with Docker and is aware of these signals. When you run your Python application with Uvicorn, it automatically handles SIGINT and SIGTERM signals.
When Uvicorn receives a SIGINT signal (typically sent when you press Ctrl+C), it will stop accepting new requests, wait for ongoing requests to finish, and then shut down gracefully.
Similarly, when Uvicorn receives a SIGTERM signal (like when Docker is trying to stop the container), it will stop accepting new requests, wait for ongoing requests to finish, and then shut down gracefully.
So, if you’re running your FastAPI application with Uvicorn in Docker, you typically don’t have to worry about manually setting up signal handlers for SIGINT and SIGTERM. Uvicorn takes care of this for you.
When you want your FastAPI application to perform some cleanup tasks on shutdown, you can use FastAPI’s “startup” and “shutdown” event handlers.
FastAPI provides a way to define functions that should be run when the application starts up and before it shuts down. These are called “event handlers.” You can define a shutdown event handler to perform cleanup tasks before your application terminates. See the examples below.
from fastapi import FastAPI

app = FastAPI()

@app.on_event("startup")
async def startup_event():
    # code to be executed when the server starts

@app.on_event("shutdown")
async def shutdown_event():
    # code to be executed before the server stops
Building and Testing the Docker Image of Streamfinity
So, we’ve ticked off all the boxes on our checklist, and now we’re all set to assemble the final Dockerfile for Streamfinity’s FastAPI prototype.
Multi-stage build
You’ll notice something extraordinary in our Dockerfile — we’re using a multi-stage build, which you can spot from the two FROM lines. In the first part, we install Poetry and its buddies and make a simple requirements.txt file.
Then, in the second part, we bring in this requirements.txt file. The neat part about this? We’re leaving behind all the Poetry stuff in our final Docker image. That means we end up with a smaller, nimbler Docker image, which is just what we want for our live setup.
Official small base image
You might also notice that we’re using python:3.11-alpine as our base image. This is an official Python image; bonus; it’s the smallest one out there. That’s another win for keeping our Docker image light and quick!
FROM python:3.11-alpine as requirements-stage

WORKDIR /tmp

RUN apk add --no-cache gcc musl-dev libffi-dev openssl-dev && \
    pip install poetry && \
    poetry config virtualenvs.create false

COPY ./pyproject.toml ./poetry.lock* /tmp/

RUN poetry export -f requirements.txt --output requirements.txt --without-hashes

FROM python:3.11-alpine

# Create a non-root user
RUN adduser --disabled-password --gecos '' appuser

WORKDIR /streamfinity_fastapi

COPY --from=requirements-stage /tmp/requirements.txt /streamfinity_fastapi/requirements.txt

RUN apk add --no-cache libffi openssl && \
    pip install --no-cache-dir --upgrade -r /streamfinity_fastapi/requirements.txt && \
    rm -rf /root/.cache && \
    rm -rf /var/cache/apk/*

COPY ./streamfinity_fastapi /streamfinity_fastapi/

# Change ownership of the app directory to the non-root user
RUN chown -R appuser:appuser /streamfinity_fastapi

USER appuser

WORKDIR /

ENV PORT=8000

CMD ["uvicorn", "streamfinity_fastapi.streamfinity:app", "--host", "0.0.0.0", "--port", "${PORT}"]
Using a non-root user
In our Dockerfile, you’ll see a line: RUN adduser — disabled-password — gecos '' appuser. This line is about setting up a user called ‘appuser’ who doesn’t have a password.
The --disabled-password part means just what it sounds like — the new appuser can’t log in with a password. This is a common trick when setting up users to run services or apps but don’t need them to log into the system.
The -- gecos ''bit is a little more technical. GECOS is extra info in the user’s profile, like their full name or contact details. By setting — gecos '', we’re telling Docker to leave this part blank for appuser.
Oh, and we also make sure appuser owns our application folder. That’s what the RUN chown -R appuser:appuser /streamfinity_fastapi part is for. This way, our new appuser has all the permissions they need to run our app in the container.
After we’ve set up appuser, we need to tell Docker to start using it. That’s what the command USER appuser is for. Once we put that in, all the after commands will be run as appuser. So, from this point on, it’s appuser who’s in charge of running our app inside the container.
Using environment variables for configuration
In the Dockerfile, you’ll notice we’ve used the ENV PORT=8000 command. This sets a default value for the port where we want our uvicorn server to be all ears.
Later, when it's time to start the uvicorn server, we use "${PORT}". This ensures the server tunes into the port set via the PORT environment variable. In other words, by using "${PORT}", we can easily change the listening port by simply setting a new value for the PORT environment variable.
Building Streamfinity’s API Docker image
Alright, we’ve got our Dockerfile ready to roll. Next up, we’ll build the container image. You could use either Docker or Podman for this.
For our example, we’ll stick with Docker. When positioned in the main directory of Streamfinity’s GitHub repository, Devon built the image using this command:
docker build -t streamfinity-api:v1.0.0-beta .This command tells Docker to build an image using the Dockerfile in the current directory (denoted by the .), and to tag the resulting image as streamfinity-api:v1.0.0-beta. Just like that, our image is set up and ready to go!
Curious about the size of our final image? We can check it out using the docker image ls command. After running that, we discovered that our final image comes in at a reasonable 150MB. Not too bad for the beta version of our application, right?

Running the Streamfinity’s API Docker container
Alright, time to put our Docker image to work! We can spin it up on our local machine with the following command. This runs the container image and maps port 8000 from inside the container to the same port on our local device:
docker run -p 8000:8000 streamfinity-api:v1.0.0-betaThen, if we open a web browser and navigate to http://localhost:8000/docs, we're greeted with our oh-so-familiar API documentation. It's a beautiful sight to see everything running smoothly.
Integrate Container build in CI via GitHub action
Devon had one more enhancement in mind — to automate building the container image each time changes were made to Streamfinity’s repository.
He updated the existing GitHub Action workflow with a few more steps to achieve this. Here’s the process these new steps would follow:
- Retrieve the current version number from the Dockerfile.
- Increment this version number.
- Build the container image with the new version number.
- Push the newly created image to Docker Hub.
These steps provide a streamlined, automated flow that eliminates manual intervention for every build, ensuring the container image is always up-to-date with the latest changes in the repository.
- name: Get current version
  id: get_version
  run: echo "::set-output name=version::$(grep -oP '(?<=^ENV VERSION ).*' Dockerfile)"

- name: Increment version
  id: increment_version
  run: echo "::set-output name=version::$(python -c "import semver; print(semver.bump_patch('${{ steps.get_version.outputs.version }}'))")"

- name: Update Dockerfile
  run: sed -i "s/ENV VERSION .*/ENV VERSION ${{ steps.increment_version.outputs.version }}/g" Dockerfile

- name: Build Docker image
  run: |
    docker build -t pkalkman/streamfinity-api:${{ steps.increment_version.outputs.version }} .
    docker tag pkalkman/streamfinity-api:${{ steps.increment_version.outputs.version }} pkalkman/streamfinity-api:latest

- name: Log in to Docker Hub
  uses: docker/login-action@v1
  with:
    username: ${{ secrets.DOCKER_USERNAME }}
    password: ${{ secrets.DOCKER_PASSWORD }}

- name: Push Docker image
  run: |
    docker push pkalkman/streamfinity-api:${{ steps.increment_version.outputs.version }}
    docker push pkalkman/streamfinity-api:latest
Using Kubernetes to deploy Streamfinity’s API
Let’s switch gears and talk about Kubernetes, the next tool in Devon’s deployment toolkit. Kubernetes, also known as K8s, is an open-source platform for automating application container deployment, scaling, and management. It groups containers that make up an application into logical units for easy management and discovery.
Containers are a good way to bundle and run applications, but managing containers, especially in large and dynamic environments, can be complicated. That’s where Kubernetes steps in. It helps you ensure your containerized applications run where and when you want them to, and it helps them find the resources and tools they need.
The benefits of using Kubernetes with Docker containers
Combining Kubernetes with Docker containers takes the advantages of containerization to the next level. Here’s how:
- Scalability: Kubernetes allows you to automatically scale your application based on resource usage like CPU and memory or custom metrics. You can increase or decrease the number of pods in your deployment.
- High Availability: Kubernetes ensures that your applications are always up and running. It restarts failed containers, replaces and reschedules containers when nodes die, and kills containers that don’t respond to health checks, among other things.
- Load Balancing: Kubernetes can distribute network traffic to help your deployment handle the load. This means your deployment can support more traffic and can respond faster.
- Rolling Updates & Rollbacks: With Kubernetes, you can progressively deploy updates to your app while maintaining high availability. If something goes wrong, Kubernetes can roll back the change for you.
Deploying Streamfinity’s FastAPI Application with Kubernetes
When deploying Streamfinity’s FastAPI application to Kubernetes, Devon chose to use a Kubernetes Deployment. This approach allows for seamless application scaling — increasing the number of pods when demand rises and scaling it down when it drops.
To handle incoming requests and distribute them evenly across the available pods, Devon set up a Kubernetes Service in front of the deployment. This Service acts as a load balancer, ensuring no single pod becomes a bottleneck, thus maintaining a smooth and responsive user experience.
Creating the deployment
To deploy the Streamfinity FastAPI application on Kubernetes, Devon crafted a YAML file to define a Deployment resource. This configuration spins up two application instances, running in separate pods — a direct result of the replicas: 2 settings.
Additionally, it exposes port 8000 of the container, ensuring the application is reachable. The relevant segment of the YAML file is displayed below:
apiVersion: apps/v1
kind: Deployment
metadata:
  name: streamfinity-api
spec:
  replicas: 2
  selector:
    matchLabels:
      app: streamfinity-api
  template:
    metadata:
      labels:
        app: streamfinity-api
    spec:
      containers:
      - name: streamfinity-api
        image: streamfinity-api:v1.0.0-beta
        ports:
        - containerPort: 8000
Adding the service
Devon creates a Service resource to facilitate communication with the Streamfinity FastAPI application pods in the Kubernetes cluster.
This Kubernetes Service is a load balancer, distributing incoming network traffic across multiple pods. The Service listens on port 80 and forwards the traffic to port 8000 on the pods. Here’s the corresponding YAML configuration:
apiVersion: v1
kind: Service
metadata:
  name: streamfinity-api
spec:
  selector:
    app: streamfinity-api # Selects pods with this label
  ports:
  - name: http # Name of this port configuration
    port: 80 # The port the Service listens on
    targetPort: 8000 # The port to forward traffic to on the pods
  type: ClusterIP # The type of the Service
Devon creates a Service resource to facilitate communication with the Streamfinity FastAPI application pods in the Kubernetes cluster. This Kubernetes Service acts as a load balancer, distributing incoming network traffic across multiple pods.
The Service listens on port 80 and forwards the traffic to port 8000 on the pods. Here’s the corresponding YAML configuration:
apiVersion: v1
kind: Service
metadata:
  name: streamfinity-api
spec:
  selector:
    app: streamfinity-api # Selects pods with this label
  ports:
  - name: http # Name of this port configuration
    port: 80 # The port the Service listens on
    targetPort: 8000 # The port to forward traffic to on the pods
  type: ClusterIP # The type of the Service
This Service, named streamfinity-api, selects pods labeled streamfinity-api to distribute traffic. It listens on port 80 (standard HTTP port) and forwards the traffic to port 8000 on the targeted pods. The ClusterIP type means the Service is only reachable from within the cluster.
This setup creates a steady, reliable front door for network traffic to reach the Streamfinity API pods.
With the API not fully secured, Devon kept it under wraps, not exposing it to the outside world. This approach served its purpose well, demonstrating to the team that the API was functioning smoothly within the cluster.
The team could see firsthand that their FastAPI application was living and breathing in the Kubernetes environment, a significant step towards a production-ready state.
Devon’s demo
After pouring countless hours into perfecting the deployment process, Devon was ready to showcase his work to the team.
He started the demo and took everyone on a journey, beginning with the Dockerfile creation. He explained his choice of the lightweight Python Docker image, Python:3.11-alpine, and the crafting of a lean Docker image through a multi-stage build. He also emphasized the security aspect of running the application as a non-root user and the intelligent usage of environment variables and log handling.
Moving onto Kubernetes, he showed how he used the Docker image to create a Kubernetes Deployment. He walked the team through the Kubernetes YAML files for the Deployment and Service, highlighting how they ensured high availability, scalability, and balanced load across multiple pods.
The demo peaked when Devon showed the Streamfinity FastAPI prototype running smoothly inside the Kubernetes cluster. The team understood how their application worked in a Kubernetes environment, complete with active pods, traffic management, and request handling.
Devon’s demo was a testament to the significant leap the Streamfinity project made toward production-ready. It showcased the power of Docker and Kubernetes in deploying a FastAPI application, addressing crucial factors like scalability, availability, and security.
Looking ahead, Devon suggested diving deeper into Kubernetes features, like Ingress controllers, ConfigMaps, and Secrets. He also stressed the need to bolster the application’s security before making it publicly accessible, underlining the importance of continuous improvement in software development.
You can access all the source code of Streamfinity’s API, Dockerfile, Kubernetes yaml files, and GitHub actions in the project’s GitHub repository. Feel free to explore, learn, and contribute.
Devon’s demo marked a significant milestone in Streamfinity’s journey, laying a solid foundation for future enhancements and growth. It was a powerful demonstration of Docker and Kubernetes’ capabilities and a testament to the team’s hard work and innovation.
So, keep coding and exploring!


