Decoding Network Policies in Kubernetes
Essential Insights for the CKS Exam

Hey there! This year, I’ve set my sights on becoming a Certified Kubernetes Security Specialist. I’ve already nailed the CKAD and CKA exams and shared my study tips here on Medium. I believe sharing these insights will make my and your journey toward certification smoother and more enjoyable.

I’m giving myself about three months tops to prepare for the CKS exam. My go-to resources? Kodecloud and The ‘Udemy Kubernetes CKS 2023 Complete Course — Theory — Practice’ by Kim Wüstkamp. Fun fact: Kim also created Killer Shell, which the Linux Foundation uses in their official prep materials.

But here’s the real deal: As I dive into my studies, I plan to jot down all the juicy details and learnings in Medium articles. And guess what? You’re reading the first one, where I will unpack Network Policies.
You already know about Kubernetes, as one of the prerequisites for taking the CKS exam is that you must have passed the CKA exam.
Network Policies is covered under the ‘Cluster Setup’ section of the CKS exam syllabus.
Network Policies
Consider Network Policies the bouncers of your Kubernetes club. They set the firewall rules for the connections between pods within your cluster.
Here’s the scoop: Sure, your Kubernetes cluster hums along just fine without these policies, like a party without bouncers. But just like at any good party, you don’t want everyone crashing into the VIP section.
More importantly, Network Policies are crucial for maintaining the security and integrity of your Kubernetes cluster. They help prevent unauthorized access and protect your applications from potential threats.
So, while your cluster might function without them, implementing Network Policies is a best practice that can significantly enhance the security of your Kubernetes environment.
Turning off all communications
Learning by example is incredibly effective. Let’s dive into our first one. By default, Kubernetes allows all pods within a cluster to communicate with each other. One thing to remember is that network policies are scoped to a single namespace.
As a starting point for securing our cluster, we should stop all pod-to-pod communications within a specific namespace. This approach is often used as a fundamental security measure. To illustrate, let’s implement a policy that denies all pod-to-pod communication within the secure namespace.
Here’s the YAML definition for a network policy named secure-deny-all:
apiVersion: networking.k8s.io/v1
kind: NetworkPolicy
metadata:
  name: secure-deny-all
  namespace: secure
spec:
  podSelector: {}
  policyTypes:
  - Ingress
  - Egress
In this policy:
apiVersion: Specifies the API version for network policy.metadata:name: The unique name of the policy; here, it's 'secure-deny-all.'namespace: Defines the namespace this policy applies to, 'secure' in our case.spec: Details the specifics of the policy.podSelector: An empty{}means it selects all pods in the namespace.policyTypes: Including both 'Ingress' and 'Egress' to block all incoming and outgoing traffic.
By setting an empty podSelector, this policy applies to all pods within the secure namespace. By stating bothIngress and Egress in policyTypes we ensure that the policy denies all incoming and outgoing connections, effectively isolating the pods.
Setting Up a Test Scenario
Let’s define a test scenario to verify the effectiveness of our network policy. We’ll start by defining two nginx pods and expose them using services:
kubectl run front-end --image=nginx --namespace=secure
kubectl run back=end --image=nginx --namespace=secure
kubectl expose pod front-end --port=80 --namespace=secure
kubectl expose pod back-end --port=80 --namespace=secure
Then, we’ll validate if we can access one pod from the other. By default, each pod should be able to access any other pod in the cluster. We’ll execute a curl command in one pod to reach the other, noting that we curl the service rather than the pod directly:
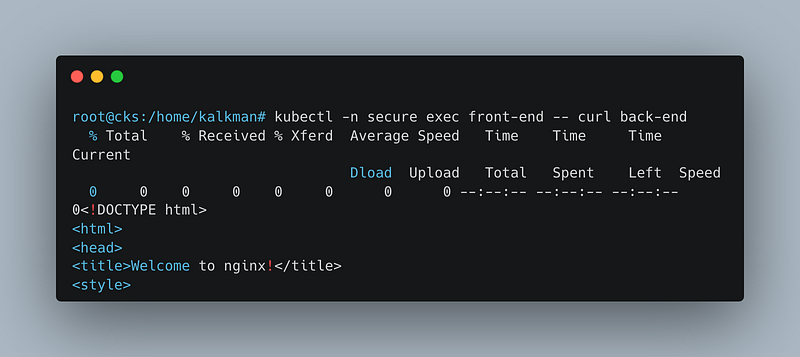
You’ll notice that the front end can reach the back end and vice versa. This is the default, open-communication behavior within a Kubernetes cluster, where pods can talk freely unless restricted.
Implementing the ‘Deny All’ Network Policy
Let’s enforce our ‘secure-deny-all’ network policy to restrict this open communication. Apply the network policy with this command:
kubectl create -f secure-deny-all.yamlWith the policy in place, try rerunning the exec commands:
kubectl -n secure exec front-end -- curl back-end
kubectl -n secure exec back-end -- curl front-end
This time, you’ll see that the front end cannot reach the back end, nor can the back end reach the front end. The network policy effectively isolates the pods by denying all ingress and egress traffic, just as we intended.

Enabling Selective Communication
Earlier, we discussed how a Kubernetes cluster, by default, allows all pods to communicate freely. Enabling only the necessary communication paths is crucial to adhere to the least privilege principle and minimize the attack surface. This approach ensures that pods have network access only to what’s essential, significantly reducing potential exploits within the cluster.
In our scenario, we want to allow communication exclusively from our front end to the back end. To achieve this, we will craft network policies enabling this communication path while blocking others.
We’ll need two network policies: one to permit outgoing traffic from the front end to the back end and another to allow incoming traffic to the back end from the front end.
Allow outgoing traffic from the front end to the back end
apiVersion: networking.k8s.io/v1
kind: NetworkPolicy
metadata:
  namespace: secure
  name: allow-egress-frontend-to-backend
spec:
  podSelector:
    matchLabels:
      run: front-end
  policyTypes:
  - Egress
  egress:
  - to:
    - podSelector:
        matchLabels:
          run: back-end
In this policy:
apiVersion: Specifies the API version for network policy. We use the stable version.metadata:name: The unique name of the policy; here, it's 'allow-egress-frontend-to-backend.'namespace: Defines the namespace this policy applies to, 'secure' in our case.spec: Details the specifics of the policy.podSelector: We select all pods with the label run and the value front-end. Our front end pods has this label.policyTypes: We want to allow outgoing traffic so we selected 'Egress'.egress:to:podSelector: We use a pod selector to select where the outgoing traffic may go. We again use labels to select the pod, in this case, pods with the label run and the value back-end.
We then apply this network policy to our cluster to allow the outgoing traffic from our front-end pod to the back-end pod.
kubectl apply -f allow-egress-frontend-to-backend.yaml
To communicate, we need another network policy that allows incoming traffic to the back end from the front end.
Allow incoming traffic to the back end from Front-end
apiVersion: networking.k8s.io/v1
kind: NetworkPolicy
metadata:
  namespace: secure
  name: allow-ingress-backend-from-frontend
spec:
  podSelector:
    matchLabels:
      run: back-end
  policyTypes:
  - Ingress
  ingress:
  - from:
    - podSelector:
        matchLabels:
          run: front-end
This looks like the previous policy, but instead, we are selecting the back-end pod and allowing ingress from the front-end pod. Again, we selected both pods using their labels.
We apply the network policy.
kubectl apply -f allow-ingress-backend-from-frontend.yamlTesting the Communication Path
After applying these policies, let’s reattempt the communication test using the exec command:
kubectl exec front-end -- curl back-endInitially, you will find that the communication still doesn’t succeed. This unexpected behavior is due to the ‘deny all’ policy we applied earlier, which inadvertently blocks all DNS resolution traffic within the cluster. DNS is vital for name resolution in communication between services.
To verify the direct connection now that we’ve established the proper Network Policies, use the IP address of the back-end pod:
Get the IP address of the back-end pod.
kubectl -n secure get pods -owideWith the IP, you should observe successful communication, demonstrating that our selective communication policies effectively allow traffic from the front end to the back end.
kubectl -n secure exec front-end -- curl 192.168.1.3
Understanding Pod Selectors: Namespace and Label vs. Namespace or Label
As you already saw in the previous section, you can select a pod with a pod selector that can use a namespace or a pod label. Now, I want to show you the subtle difference between selecting a pod by a namespace AND a label versus selecting a pod by a namespace OR a label.
Combining Namespace and Label in Pod Selectors
When creating a pod selector that uses a namespace and a label, you specify a targeted policy. This policy applies only to pods that meet both criteria: they must be in the specified namespace and have the specified label.
Example Scenario:
Consider a network policy that allows traffic from pods in the frontend namespace that also have the label role=client. This policy is explicit and restricts traffic to pods that fulfill both conditions. It’s an intersection of criteria:
ingress:
  - from:
    - namespaceSelector:
        matchLabels:
          name: frontend
      podSelector:
        matchLabels:
          role: client
Only pods in the frontend namespace with the role=client label are selected in this example. It's a precise approach, ideal for scenarios where you need strict control over which policy affects pods.
Using Namespace or Label in Pod Selectors
Alternatively, when you set up a pod selector to use a namespace or a label, the policy applies to pods that satisfy either one of the conditions. This setup is broader and less restrictive, encompassing a more comprehensive range of pods.
Example Scenario:
Imagine a policy where you want to allow traffic to pods either in the backend namespace or have the label role=server, regardless of their namespace. This configuration creates a union of the two sets.
ingress:
  - from:
    - namespaceSelector:
        matchLabels:
          name: backend
    - podSelector:
        matchLabels:
          role: server
In this case, the policy targets pods in the backend namespace and any pod across all namespaces with the role=server label. It's a more inclusive approach, suitable for scenarios where the policy needs to cover a broader range of pods.
The difference between both examples
A critical syntactic detail in both examples is using the “-” character in front of podSelector in the second example. This "-" transforms the structure into an array, representing a logical OR. In the context of Kubernetes YAML configuration, this distinction is subtle but significantly impacts how the policy is interpreted:
- Without the “-” (First Example): The absence of “-” in the first example indicates that
namespaceSelectorandpodSelectorare part of the same condition block. This configuration enforces that both conditions (namespace and label) must be met simultaneously. - With the “-” (Second Example): The presence of “-” in front of
podSelectorin the second example makes it part of an array under thefromfield. This structure represents an OR condition, meaning that the policy applies to pods that satisfy either thenamespaceSelectorcondition or thepodSelectorcondition, but not necessarily both simultaneously.
Understanding this nuance is critical when defining network policies, as it changes the scope from a specific subset of pods (AND condition) to a broader range of pods (OR condition). This distinction is critical in ensuring that your network policies accurately reflect the intended traffic control within your Kubernetes cluster.
Policy Priority and Conflict Resolution in Kubernetes
In a Kubernetes environment, particularly in complex or large-scale deployments, it’s common to have multiple network policies applied to the same set of pods. This raises an important question: How does Kubernetes handle policy conflicts and determine which rules to enforce?
How Kubernetes Resolves Conflicts
Kubernetes adopts a straightforward yet powerful approach to resolve conflicts in network policies:
- Cumulative Effect: Kubernetes network policies operate cumulatively, unlike some systems that use a “last wins” or priority-based approach. This means that if any network policy allows a particular type of traffic, it is permitted, irrespective of other policies that might restrict it. In essence, network policies in Kubernetes are additive and not restrictive.
- Deny Takes Precedence: While policies are cumulative for allow rules, any explicit deny rule in a network policy will take precedence. If a policy explicitly denies specific traffic, that rule will override any allowances from other policies. This is key in ensuring that restrictive policies for enhancing security are addressed.
- No Specific Order of Evaluation: Kubernetes does not process network policies in a specific order. It considers all applicable policies collectively. Therefore, it’s essential to understand that the order in which policies are applied or created does not affect the resultant network policy set for a given pod.
Designing Network Policies to Avoid Conflicts
To effectively manage network policies and avoid conflicts, consider the following best practices:
- Explicitly Define Allow and Deny Rules: Be clear and explicit about what is allowed and denied in your network policies. Avoid relying on the absence of a rule to imply denial.
- Use Specific Label Selectors: Employ specific label selectors to apply policies to the intended pods. Broad or vague selectors can lead to policies being applied to unintended pods, causing conflicts.
- Regularly Review and Audit Policies: Periodically review all network policies in place. This practice helps identify overlapping, redundant, or conflicting rules that might have been inadvertently introduced.
- Document Policy Intentions: Maintain clear documentation for each network policy, explaining its purpose and scope. This documentation is invaluable for future reviews and understanding the interaction between multiple policies.
- Test Policies in a Staging Environment: Before applying new policies in a production environment, test them in a staging environment. This allows you to observe the combined effect of various policies and ensure they work as intended.
Conclusion
As we have journeyed through the landscape of Kubernetes network policies, it has become clear that they are more than mere rules; they form the foundation of a secure Kubernetes environment.
Our exploration of the nuances in policy application — from the cumulative effects and the overriding nature of deny rules to the intricate details in pod selector syntax — has armed us with the essential knowledge to construct a formidable defense against potential cybersecurity threats.
From our initial foray into implementing a comprehensive ‘deny all’ policy to delving into the complexities of selective communication, we have unraveled how each element of network policy plays a crucial and distinct role.
The insights gained from our discussion on policy priority and conflict resolution emphasize the significance of a thoughtful and strategic approach to network policy design, ensuring that our policies coexist and complement each other, enhancing the overall security posture of our Kubernetes clusters.
As I venture further into my studies for the CKS exam, this exploration of network policies marks just the beginning of a deeper dive into Kubernetes security.
Stay tuned for more insights and discoveries on this path to mastering Kubernetes. Until next time, happy learning and secure configuring!


